2. Quick Start
Quick start with Basic Functions of Baosky IDE
Please refer to the following for the operation process:
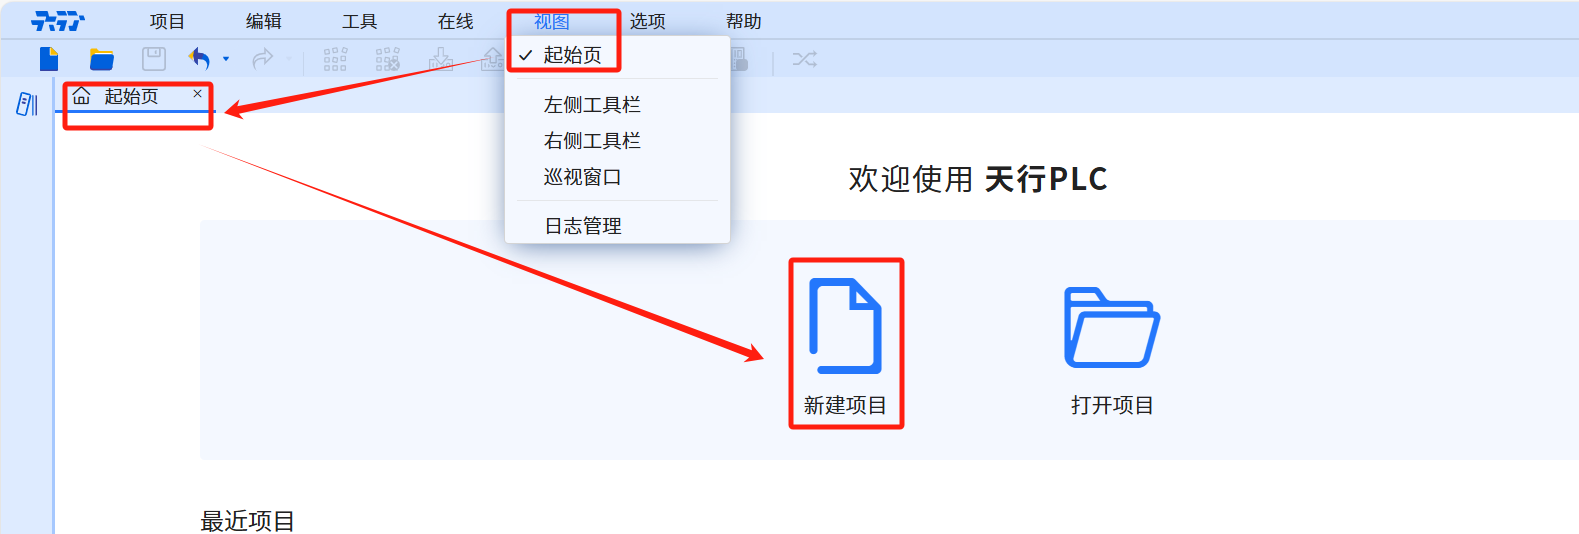
2.1. Create a new project
- This section uses the start page under the menu bar as a way to create a new project. Fill in the project name, saved location, author, and comments to complete the new project. The author and project comments are optional, and the project save location can be the default save location. For specific operation methods, please refer to
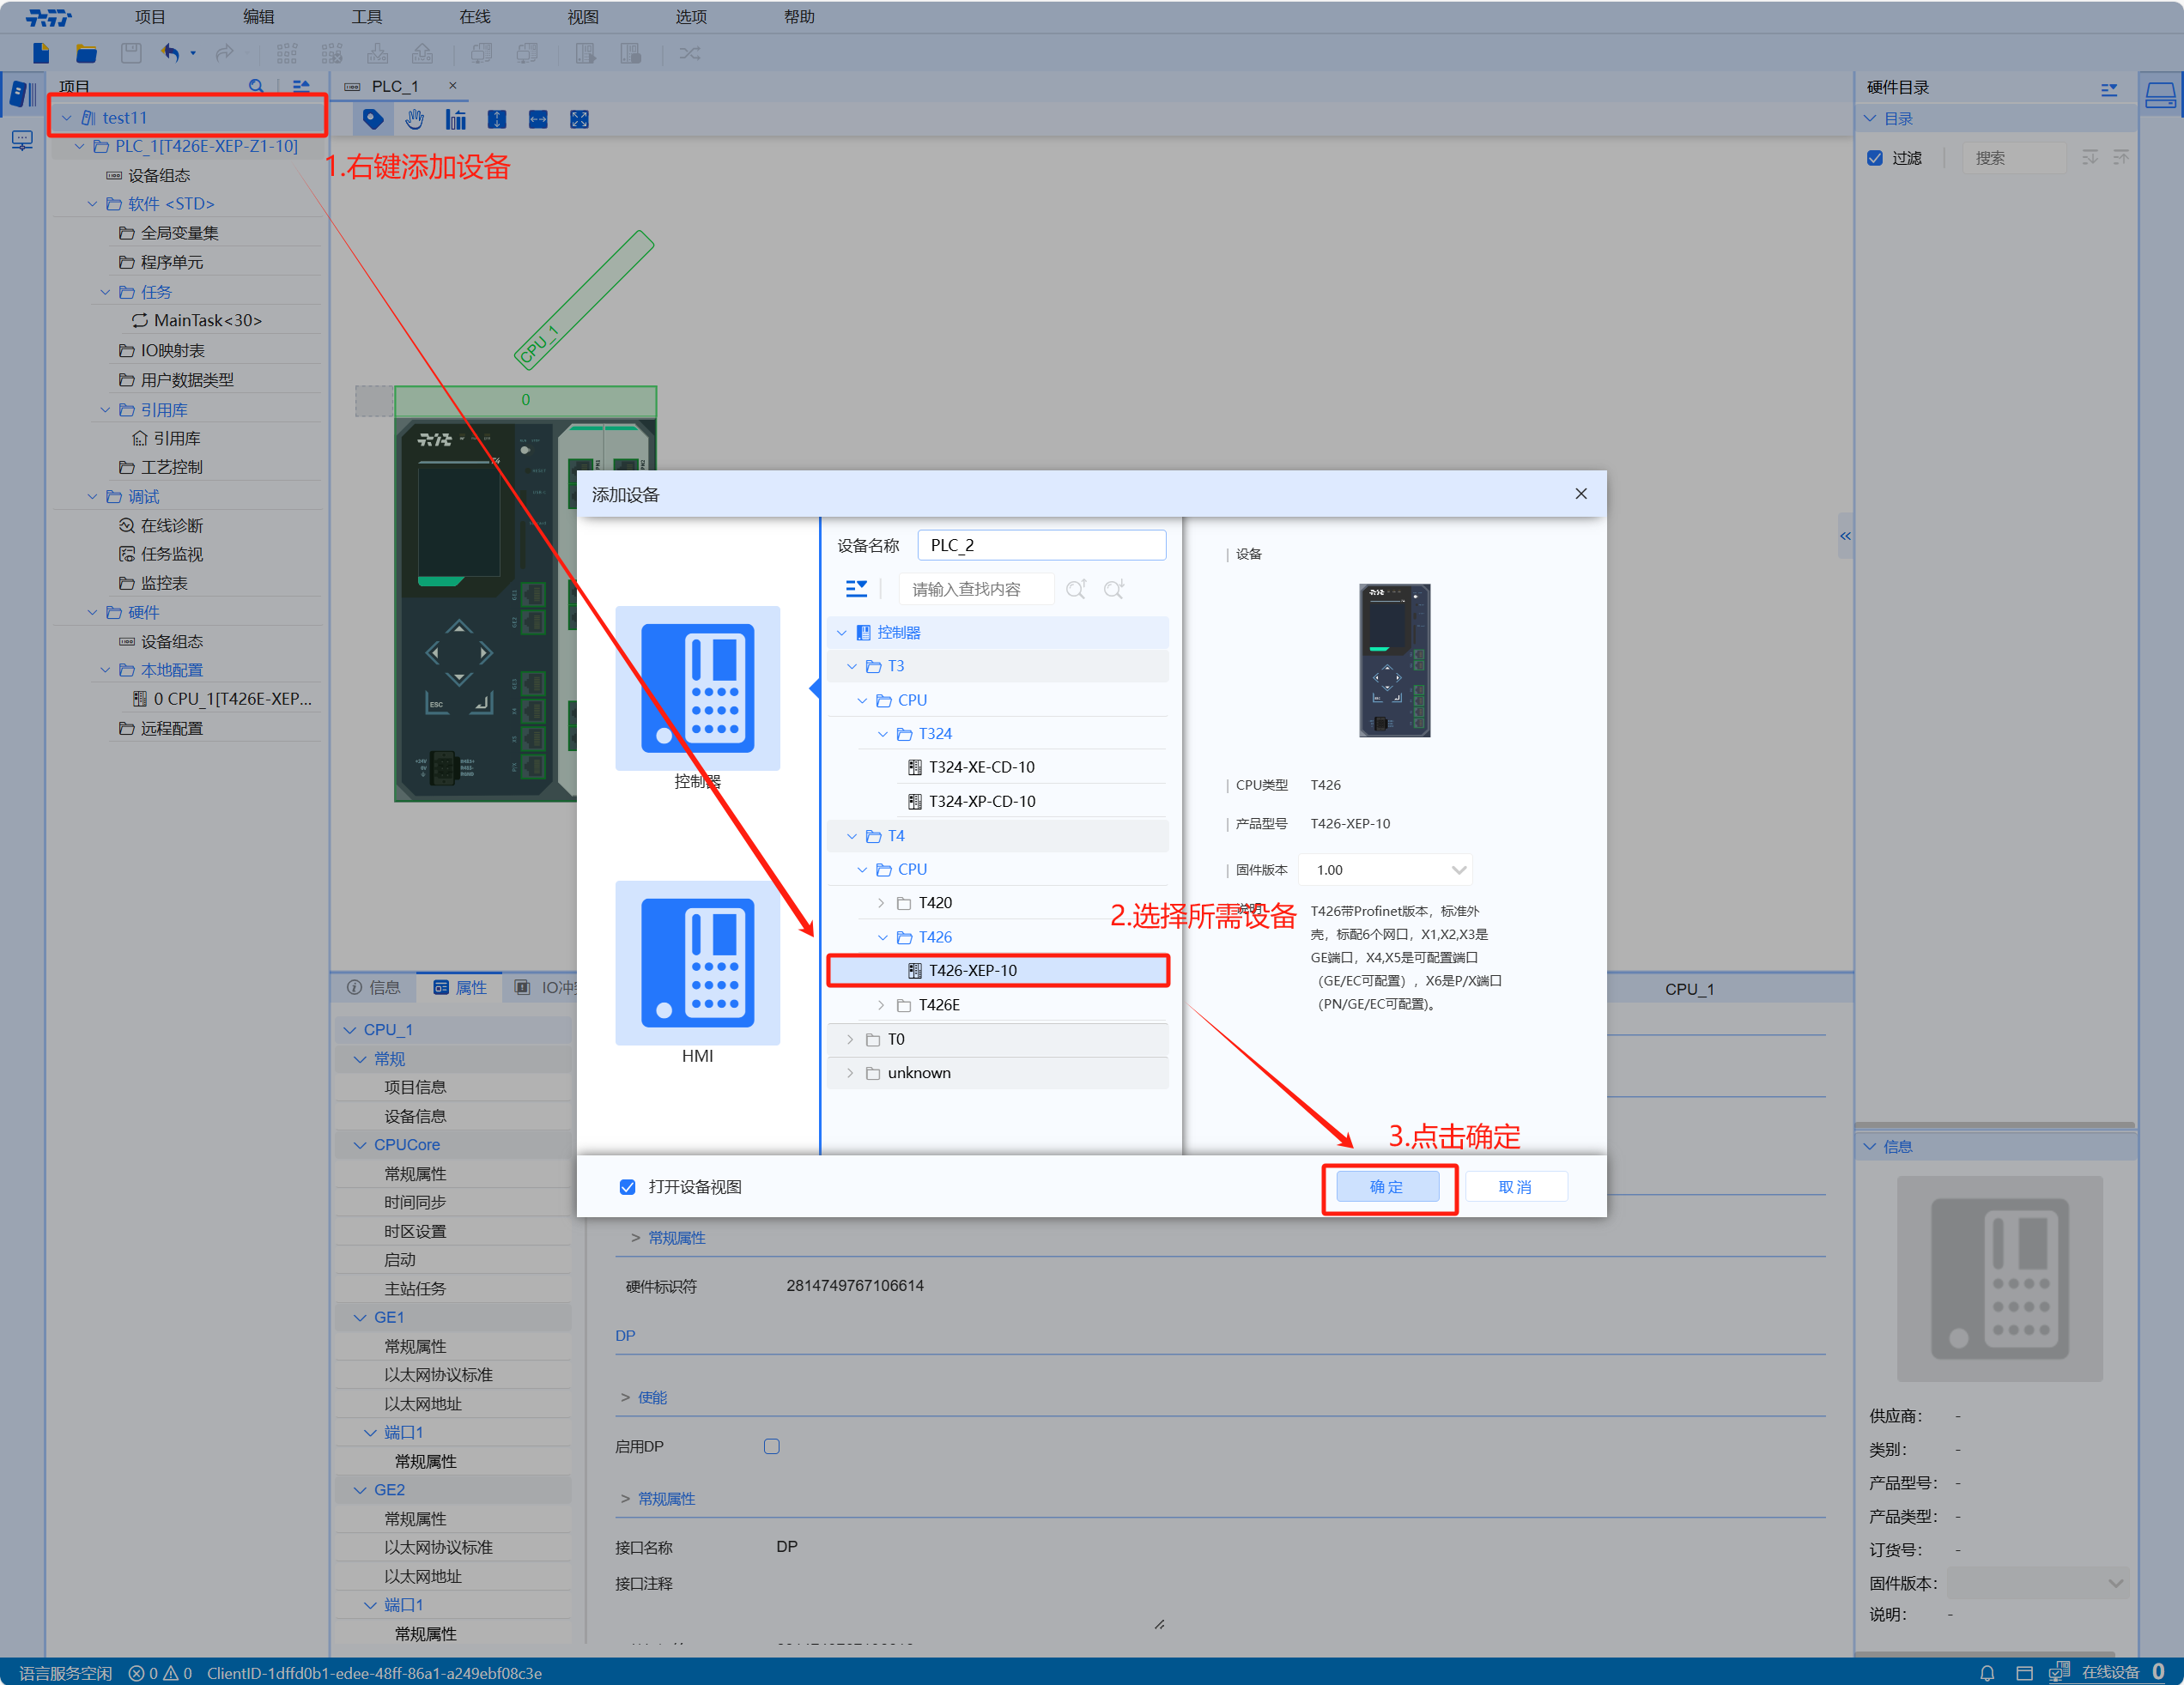
2.2. Add device
Add PLC device
- In this section we are using the T426E-XEP-Z1-10 device. Right-click on the project tree to add the device and select the required T426E device model to successfully add the PLC device. Add device CPU, add device CPU successfully
Add master slave station
- In this section we use the P/X interface to connect the TM30 slave station. The operations are as follows:
-
Double-click Project Tree-Hardware-Local Configuration-Properties to modify the P/X Ethernet protocol standard
-
Right-click the project tree-Add EC master station-select P/X-port
-
Right-click to add a slave station (select the remote station model based on actual use)
-
Add the TM30 IO module, as shown in the figure, and the addition of hardware devices is completed

-
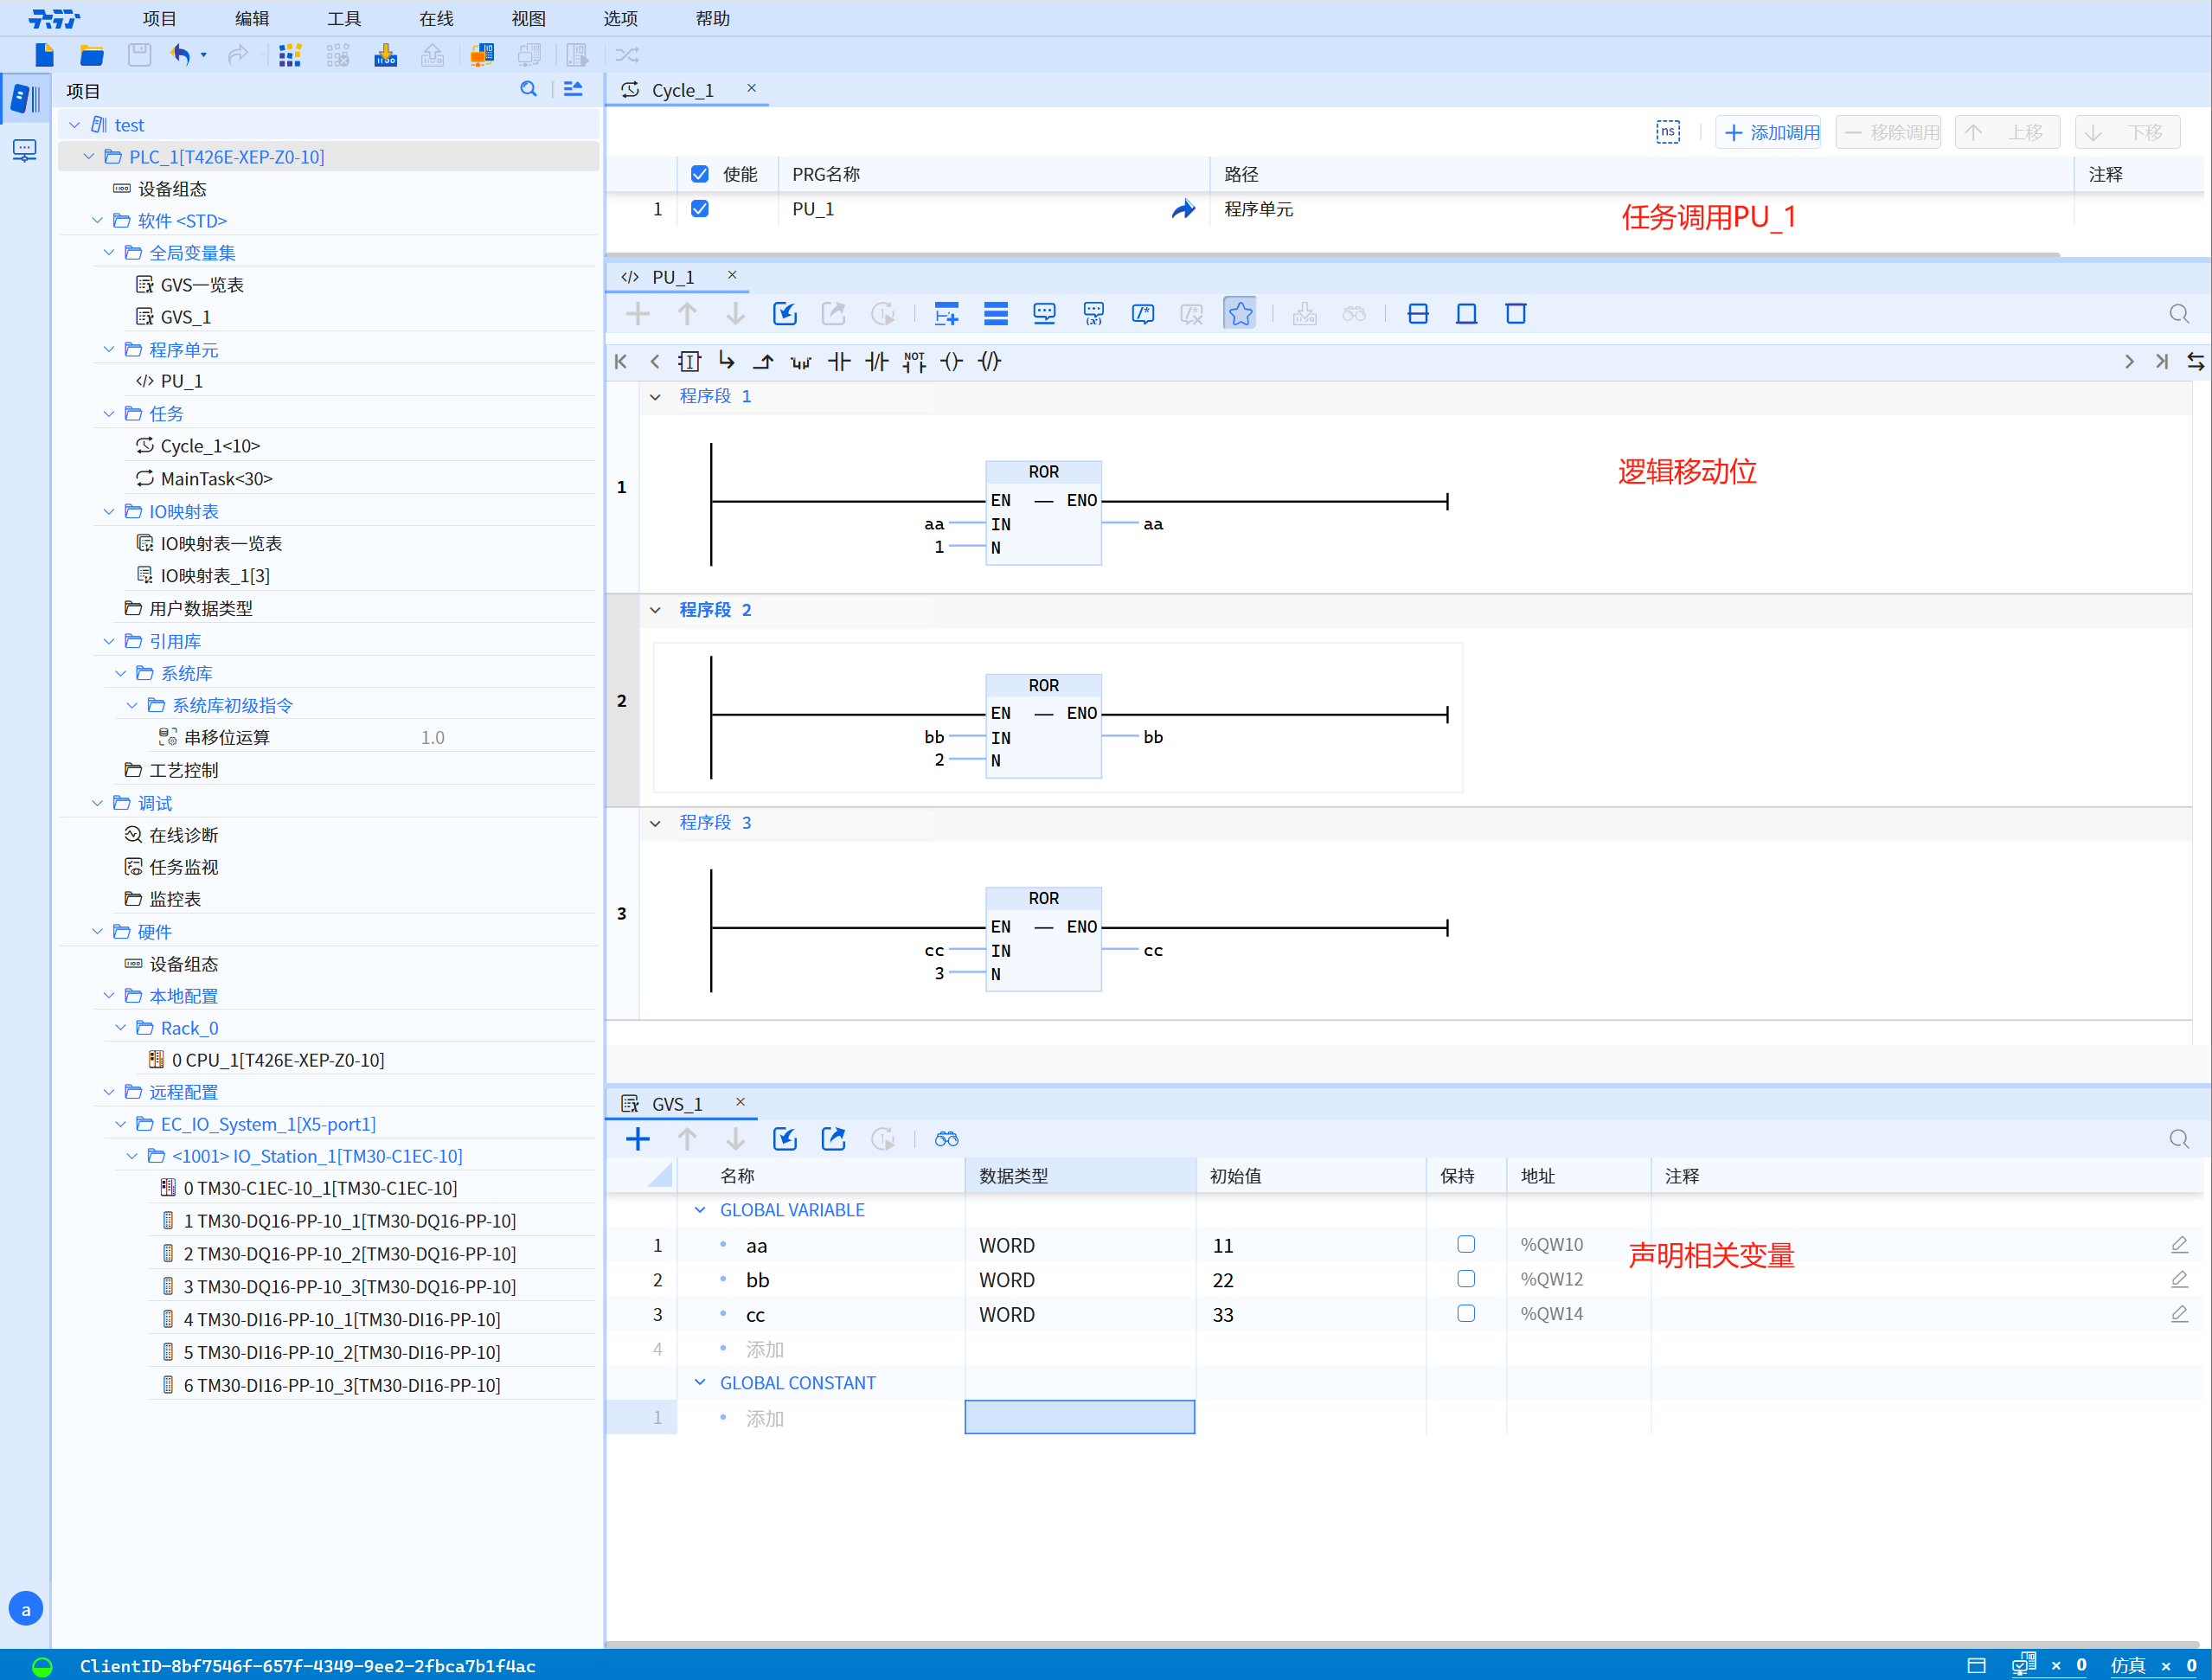
2.3. Programming
- Create a new global variable GVS_1
- Create a new program unit PU_1
- Define variables and assign values to variables
- Add fixed-cycle loop tasks
- Add IO mapping variables in the IO mapping table. The module used in this section is the DO module, that is, the rule when configuring the address is %QW10. For details on how to configure it, please refer to IO variable mapping table
- For specific display, please refer to the figure below:
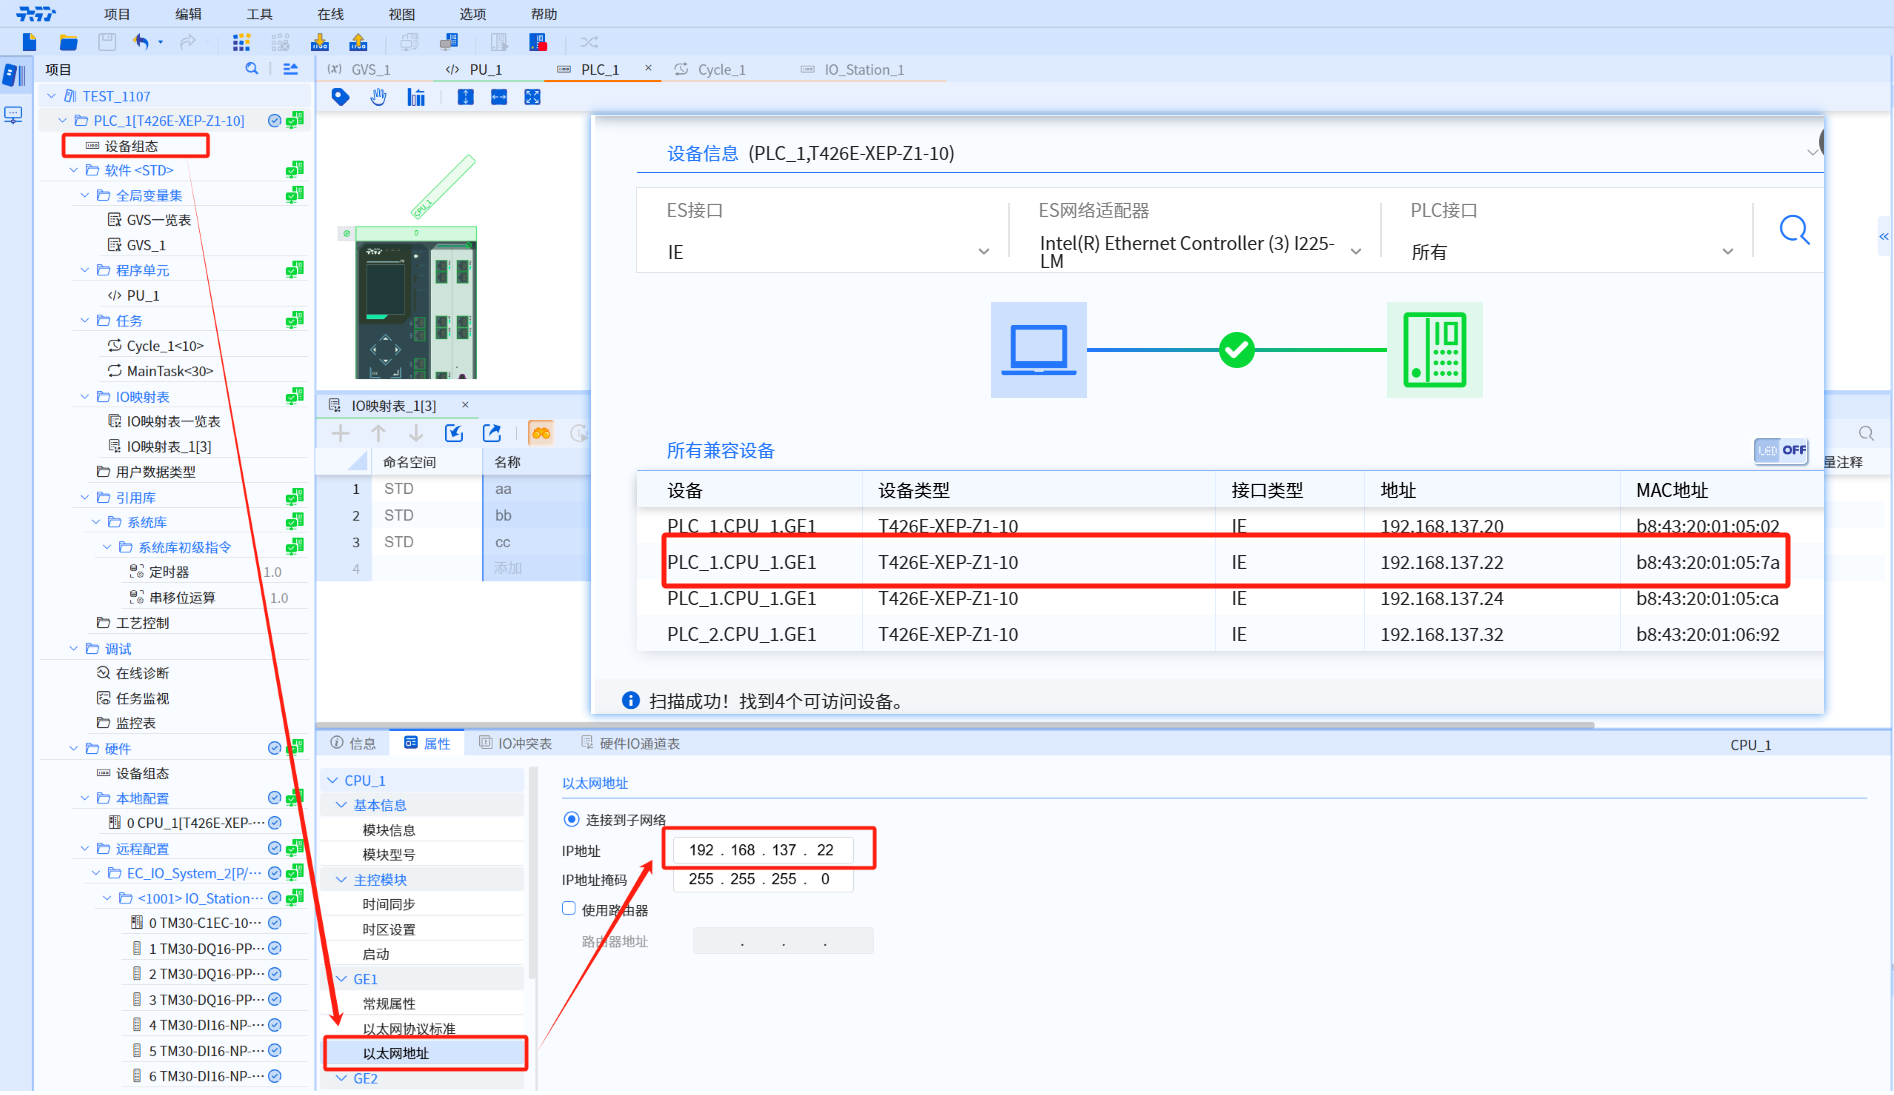
2.4. Scan network
Scan available devices. In this section, we use the T4 device. The IP of T4 is 192.168.137.22. The specific display is as shown in the figure below:
- Modify the device configuration properties and set the IP to be consistent with the IP of T4, as shown in the figure:
2.5. Compile and download
In this section we use the menu bar--online--directed download. For specific analysis, please refer to Compile and Download
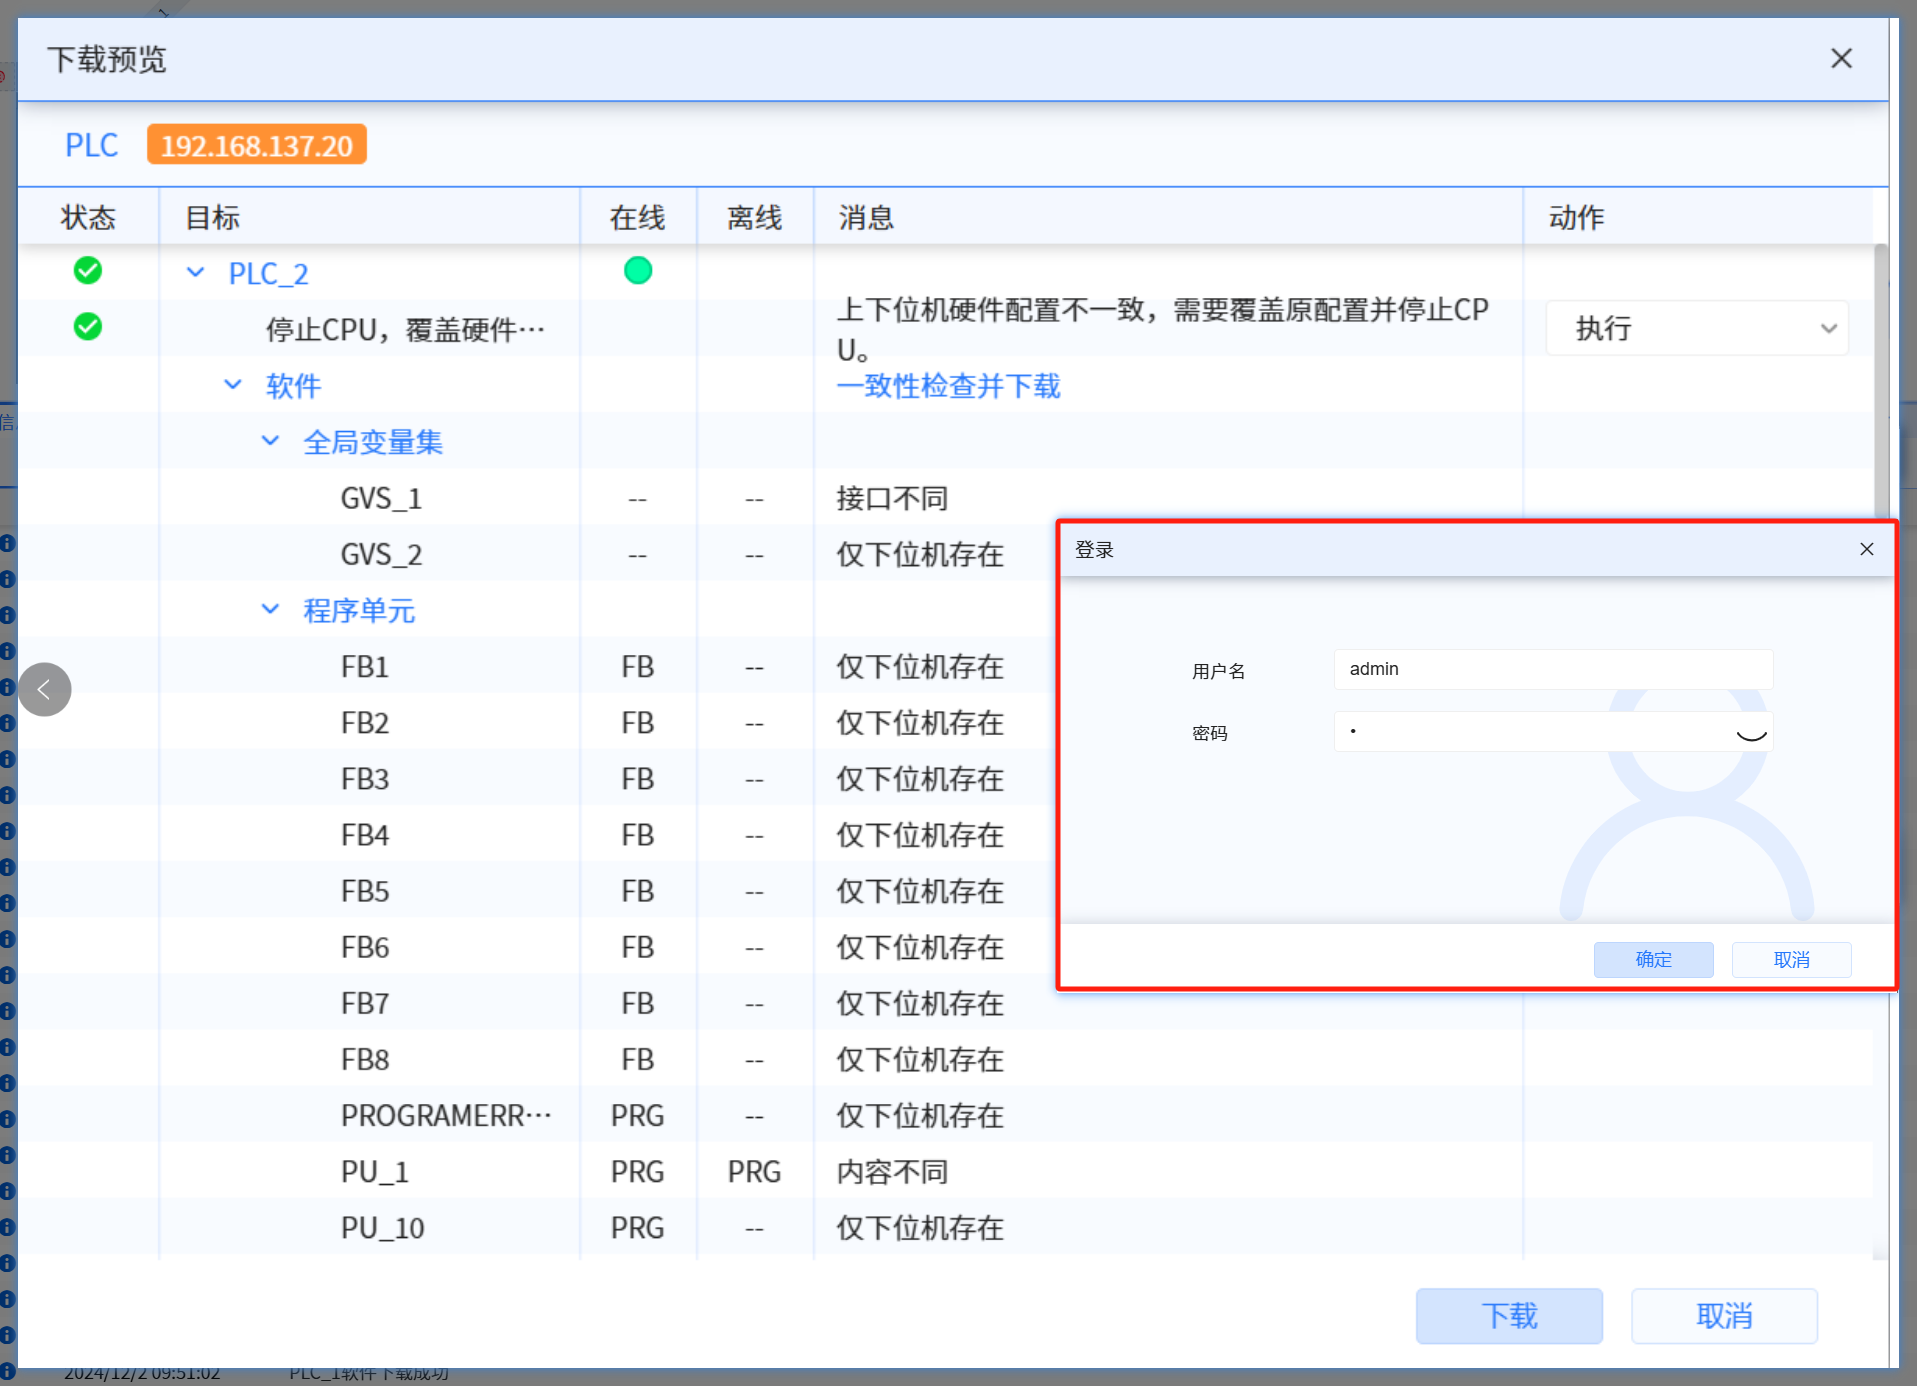
- Select the corresponding module in the download preview, and the specific display will be as shown in the figure below:
- Enter the username and password, and the specific display is as shown below: (For details on how to add a username and password, please refer to UMAC)
- Click online to view the project running results and the status of the project while the software is running, as shown in the figure below:
- The project runs successfully
